A New Pattern From Across the Pond

Good evening!

Earlier tonight, my mom went to get the mail. She came back with a package for me! I was excited because I knew it was my pattern, courtesy of Ellie West Simple Sewing. All the way from Cork, Ireland, it was my first time receiving anything from across the pond.
Here is what I received in my little package:

Ellie West Package

In my package was a lovely letter from Karen and a complementary pattern of the Ellie West Peter Pan Pattern. To my surprise, there were two patterns in this instruction booklet, 1 for s/m and m/l. For the price, the pattern is a great price- it’s basically 2 patterns for the price of 1!

Although I haven’t read the entire pattern yet, I skimmed through the booklet and was impressed with the step-by-step instructions. Being an English Major, I liked the tone and voice the instructions were written in. I felt as if I was talking to a friend who was helping me sew a new project.

I can’t wait to sew this pattern. My mom likes the collar pattern and has asked me to make one for her!

Don’t forget to check out the Ellie West Etsy shop to purchase a copy of the affordable, simple, and chic Peter Pan Collar pattern!


— Alyssa

Link

Hello fellow bloggers!
It’s been awhile since I’ve worked on a sewing project, but earlier this week, I was contacted by a fellow sewing blogger on Twitter. She asked me if I would sew one of her business’s patterns. I was flattered that she included me among the other bloggers she asked to participate in this project.

Naturally, this sparked my interest in sewing projects once more. Although, I love sewing, making crafts, and working on hand-made projects, the new-ish job I got working at a law firm really took up a lot of time. However, just reading about Karen West and her mother, Ellie, really inspired me to dig out some of my old sewing projects that are yet to be completed. I’m looking forward to seeing some paper patterns turn into 3d works of art with fabric.

Here is the Ellie West Etsy page. I love the Peter Pan Collar pattern! It’s even detachable, so you can wear it multiple ways and mix up your wardrobe with it.

Happy sewing!

–Alyssa

Fly Away With Me

Image

An update on my “Chic Chick!” I’ve sewn 1 wing on. This is how it looks. The other wing I have pinned on. I also have 2 different-sized black pins as temporary eyes, so I can get an idea of how big/small I should make them for the bird. I sewed the wings like that on the chicken because it sort of looks like it is flying! Here are some pics of my progress!

From up above.

From the side.

I think tomorrow after work, I’m going to sew on the other wing in the same fashion as the one that is already done. Then I will design some cute eyes out of felt, since I don’t have any coordinating buttons or actual plushie eyes to use. Stay tuned for the finished project!

– – Alyssa

Chic Chick

Image

Happy second day of March!

Currently, I am working on a little chicken. I’m making it for my mom to put in her kitchen. She likes chickens and roosters so I thought it would be perfect for her. I’m following the pattern from Martha Stewart’s website, which can be found here.

I haven’t finished the plushie yet. I’m sewing up the wings right now, and I think I’m going to add some eyes. I didn’t include a waddle because I wasn’t sure if I would like how it looked, so I might add one after. We’ll see! Here are some pictures of my progress:

I cut out the pattern pieces.

I used the pattern to make felt pieces.

Mostly sewn up, ready for stuffing!

So that’s where I am right now with my chic chick. Im excited to finish it up!

Sunflower Pin

Image

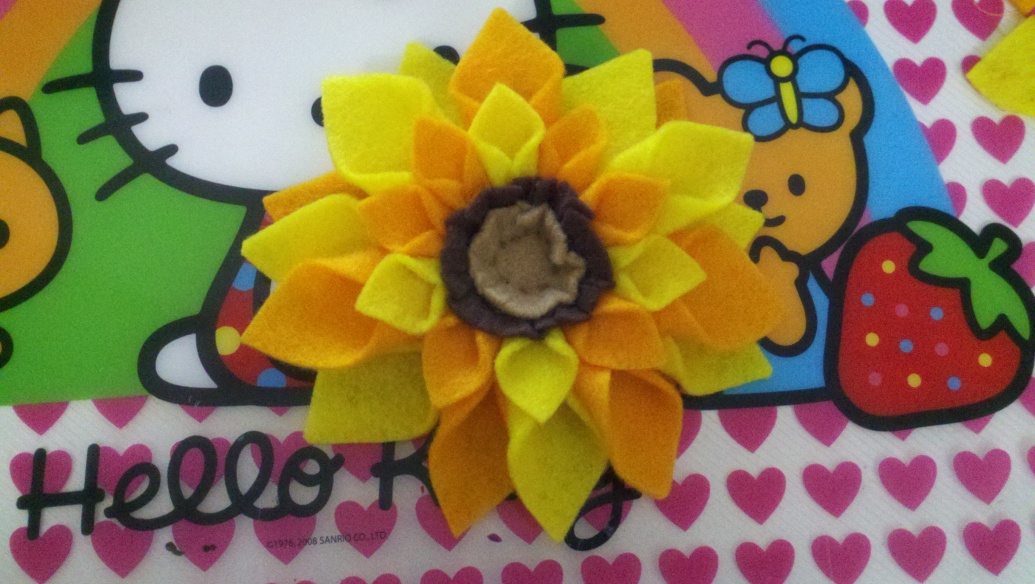
So I decided to make one of the projects from my Future Projects Idea tab. A sunflower pin!

Here are the steps I took, following the tutorial found in the link below, after the pictures:

Sunflower parts

I made all of the parts I need, using felt, to create my sunflower pin.

I cut all of the square pieces into flower petals and they are ready to be sewn onto the brown circle to create the sunflower shape.

I’ve now sewn most of the bigger petals to circle. I made a mistake of not sewing the petals closer together, so I had to sew more on top of the first layer. In this picture, I’ve also started sewing on the smaller petals.

Here are all of the petals sewn on, as well as the two circles that make up the sunflower. I am going to sew a button in the center to complete the look. I also did not use all of my 18 large petals and 12 smaller petals. I used 16 large petals and 10 small petals.

I attached the pin on the back as well. I used fabric glue for the brown felt circle because I did not want to puncture thread through the petals I had already sewn on.

And its now ready to wear. 🙂

I used a mother-of-pearl button for the center and sewed it on with gold metallic thread. I love the colors together, it definitely looks bright and cheery! Perfect for spring or summer on blazers, cardigans, or plain tote bags!

Check out the original tutorial here.

– – Alyssa

Mini pillow is done!

Image

So I finally finished Dave’s mini travel pillow! I think it turned out quite well, for being my first pillow and my first attempt with a sewing machine.

Dave's pillow

In this picture, all of the sides are sewn.

With my Singer, I sewed all four sides together. On the bottom, I left an opening wide enough to comfortably fit my hand in because I would have to stuff it after.

After stuffing the pillow, it was time to stitch it closed.

I didn’t want the pillow to be over-stuffed or too thin so it took me awhile to get the stuffing amount just right. But when I was happy with its density, I used the lighter color thread and used a closing stitch, pinching both fabrics close together so that it would match up with the rest of the sewn parts. It wasn’t easy and it didn’t turn out as well as I wanted it to, but I think I did a pretty good job for my first pillow!

Here is the pillow all stitched up finished!

I had to close my pillow “twice” because the first time, I didn’t grab enough of the fabric. So when I closed it initially, it was hanging loosely. So I “closed” it again, this time using pins to guide me. I think it turned out great! Lotso Bear seems to like it!

Side view of pillow.

Here’s a side view of the pillow. It’s not too thick, nor too thin. With a bit of kneading, the stuffing will even out perfectly. The finished pillow is slightly bigger than a sheet of paper (which I based my initial pattern off of), measuring at 12 in x 9 in.

I love the end result and I can’t wait to make more!

– – Alyssa

Dave’s Pillow

Image

Here’s a picture of what I’m currently working on. It’s basically a small decorative pillow. The base is fleece. And the cute little patterns are done with felt. I drew some of the shapes myself, others I found online. The letters are actually from a pattern set my mom made when she used to be a teacher in the Philippines. All of the felt pieces were sewn on by hand because of how small and intricate some of the pieces are. So far I have sewn on the top of the pillow sides together with my Singer, just so I could have an idea of what it would look like when all sides were sewn.

His name surrounded by the things he likes.

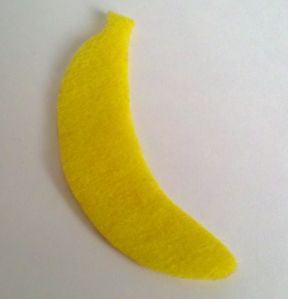
The last thing I am putting on his pillow is a little banana because that is his favorite fruit. 🙂

DOMO!

Image

So every new blog needs some content to build up a portfolio or repertoire. I’ve been sewing things handmade for the past year or two, and only this year I bought my first sewing machine. So here is a post, in retrospect, showcasing the two Domo plushies I made by hand the last two years ago.

Original Domo and custom-made Valentine's Day Domo.

I made the original Domo during winter of 2010. Valentine’s Day Domo was made sometime in January 2011. Both Domo’s are entirely hand-sewn. They are made simply with felt, thread, and stuffing. I do not have the website where the pattern was found, but I’m sure a quick Google search would pop it up or something similar!

– – Alyssa